Sewing Machine Repairs and Servicing
We provide sewing machine repairs and servicing for individuals, schools, and colleges, with special discounts for educational institutions. Repairs are handled on a queue basis, with an estimated turnaround time of around 7 days from receipt of your machine.
We have over 20 years experience of looking after our customer's sewing machine repairs and servicing. From old hand-cranked models to the latest computerised embroidery machines, we believe we are the best sewing machine service centre in the UK and a certified warranty service centre for top brands including...

A service includes maintenance, internal cleaning, oiling and minor adjustments to optimise sewing performance and preserve the life of the machine. This is aimed at machines in working order that need preventative maintenance and adjustments.
How much does it cost to service a sewing machine?
Sewing Machines Price List
Basic Mechanical - £58
Small Computerised - £65
Large Computerised - £75
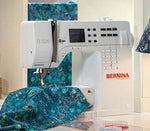
Bernina (New) 4, 5 & 7 Series - £175
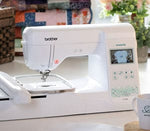
Embroidery Machines Price List
Machine Only - £75
Machine + Module - £125
Brother PR (Minor) - In-store Only £150
Brother PR (Major) - In-store Only £250
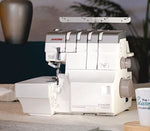
Finishing Machines Price List
Domestic Overlockers - £65
Domestic Coverstitch - £65
Combi Overlocker & Coverstitch - £120
The option to return the machine back to the manufacturer may in some cases be available to the customer. In our experience, the manufacturer’s charge will be 35% - 50% more than the prices shown above.
Sewing Machine Repairs
Out of warranty repairs will be quoted for. This is aimed at broken machines requiring major adjustments or parts.
If you live locally to our Shop in Redruth, Cornwall, simply give us a call on 01209 216942 to book your machine in.
-
Bring your machine into our shop
We are open Monday - Saturday 9.30 am - 5.00 pm
-
Engineers’ Inspection and Evaluation.
Our standard prices above will usually apply however if it doesn't then our engineer will evaluate your machine and call you to advise on charges for the repair, service, both, or otherwise.
-
Agreed work undertaken.
Once the agreed work is completed, your machine will be tested and approved, we will then call you to take payment over the phone, or you can pay on collection.
-
Collection of your machine.
Your machine will be available for collection at your convenience. We ask you collect within a week where possible.
How do I service my sewing machine myself?
Keeping your sewing machine well-maintained is essential for long-lasting, high-quality performance. Here’s a simple guide on how to service a sewing machine at home, complete with tips to ensure smooth operation and avoid unnecessary repairs.
Regular servicing of a sewing machine can prevent common issues like skipped stitches, tension problems, and noisy operation. With routine care, your sewing machine will be ready whenever you are, avoiding the hassle of unexpected breakdowns.
1. Gather Your Sewing Machine Maintenance Supplies
- Lint-free cloth
- Small cleaning brush (an old makeup brush is great)
- Sewing machine oil (check your manual to see if oiling is required)
- Screwdriver (most machines come with one)
- New sewing machine needle
2. Power Off and Unplug for Safety
To prevent accidents, always turn off and unplug your sewing machine before starting any maintenance.
3. Clean Out Dust and Lint Buildup
Lint and dust can clog parts and cause stitching issues. Follow these steps to clean your sewing machine effectively:
-
Open the bobbin and needle plate area (you may need a screwdriver).
-
Use a small brush to remove lint and dust. Avoid using compressed air as it may push debris further inside.
Tip: Regular cleaning keeps your sewing machine running smoothly, so aim to clean out lint after every project if possible.
4. Oil Moving Parts (if Recommended)
Check your sewing machine manual to see if oiling is required. If it is, here’s how to do it:
-
Use sewing machine oil only—never use household oils.
-
Apply one drop to the moving parts listed in your manual, such as the hook area or under the needle plate.
-
After oiling, run a few stitches without thread to distribute the oil, then wipe away any excess with a cloth.
Pro Tip: Proper oiling ensures smooth operation, extending the life of your sewing machine.
5. Replace the Needle Regularly
A fresh needle protects your fabric and stitching quality. A good rule of thumb is to replace the needle every 8-10 hours of sewing or whenever it feels dull.
6. Check Threading and Adjust Tension
Incorrect threading and tension issues can cause skipped stitches and uneven stitching. Ensure the machine is threaded correctly according to the manual and adjust the tension settings as needed. Test on scrap fabric to confirm smooth stitching.
7. Wipe Down the Exterior
A soft cloth is ideal for wiping down the exterior of your machine, keeping it free of dust and fingerprints.
8. Inspect for Loose Parts
Loose screws or parts can disrupt sewing machine performance. Check all accessible parts and tighten any loose screws carefully (without overtightening).
When to Seek Professional Sewing Machine Service
Even with regular home maintenance, some sewing machine issues require professional attention. If you experience:
- Unusual noises
- Skipped stitches or irregular tension
- Difficulty turning the handwheel
Stop using the machine and book it in for a service with us to prevent further damage.
Still having problems with your sewing machine? Try these things:
The first thing to remember is not to panic! Don't let your frustration get in the way of your good sense. Depending on the type of problem you're having, the following suggestions may be of immediate help to you.
Check the Tension...
As you change projects and start sewing on different weight materials, you should test stitch on a piece of scrap material of the same weight before beginning the actual project so you can adjust your upper tension to that particular fabric. As an example, if you're changing from a denim type fabric to a silky fabric, you would definitely want to make sure the tension is correct and the stitching looks right before you start to sew the garment.
To determine whether the upper tension is too tight or too loose for the fabric you're wanting to use, try the following test. Take a small scrap of the fabric, fold it, and stitch a line ON THE BIAS of the fabric, using different colours of thread in the bobbin and on top. Grasp the bias line of stitching between the thumb and the index finger.
Space the hands about 3 inches apart and pull with an even, quick force until one thread breaks. If the broken thread is the colour of the thread in the needle, it means that the upper tension is too tight. If the broken thread is the colour of the bobbin thread, the upper tension is too loose. If both threads break together and take more force to break, it means that the tensions are balanced.
Perfect tension look like the image below, the 2 threads meet in the middle of the fabric.

Check the Bobbin...
The most probable cause of the lower thread breaking is an improperly wound bobbin. Regardless of where you wind the bobbin, inside the machine, on the top of the hand wheel or on the front side near the hand wheel, the basic "bobbin" rules apply.
- Always start with an empty bobbin. Never wind one colour over another colour.
- Don't wind the bobbin so full that it would be tight and hard to insert into the bobbin case. Most machines have an automatic "shut off" when the bobbin gets full, but if yours does not, be careful not to fill it too full.
- Wind the bobbin evenly across and in level layers.
- Never mix different sizes of thread in the bobbin and on the spool, unless you're doing sewing machine embroidery or some specialty type of sewing. Using different weights of thread on the spool and in the bobbin for general sewing will cause ragged stitches as well as other stitching problems.
Check the Needle..
Probably 25% of machine repair jobs I go out on, the only problem was that the needle was put in backwards. I know you're probably saying "I've been sewing most of my life and I know how to put the needle in the sewing machine"; however many times a seamstress will get in a hurry and not give the needle a second thought when putting a new one in the sewing machine. If your sewing machine will not pick up the bottom thread or skips stitches badly, in most cases it's because the needle is in wrong.
Each sewing machine requires that the "flat" side of the needle be put in a specific way - facing the front, the back, etc., depending on your particular make and model. If you have a sewing machine that takes a needle that doesn't have a flat side, you'll notice that each needle has a groove in it where the thread lays as it penetrates the fabric. Depending on whether your machine shuttle system faces to the front or to the left, the groove of the needle will also face front or left.
Check the Threading...
An additional area to check for stitching problems is whether the sewing machine is threaded properly. Each sewing machine has a certain sequence for threading, and it only takes one missed step in the sequence to cause your machine to skip stitches. If you're in doubt, take the top thread completely out and start all over again.
Many times it's the small things that cause frustration and loss of sewing time. Taking just a few minutes before starting a project to make sure everything is in order can save hours of "down" time, not to mention frayed nerves and the possibility of having to take the sewing machine to the repair shop unnecessarily.
Helpful Sewing Machine Repair Videos