


Wonderful ideas & fun for all of us
Brilliant map, would be very helpful to the people I’m trying to send down to you to show where the train station is too please & an easy walk down to your wonderful shop
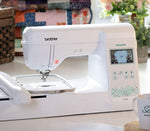
Sewing Machine Tension Advice
What is tension?
Sewing machine beginners are often confused by thread tension. It’s also something more experienced sewers can be confused by when they upgrade or buy a new machine.
It refers to the amount of thread that can pass through the machine to create the stitch. The more thread in the stitch, then the looser the stitch. The less thread, then the tighter the stitch. For a machine to create a stitch that looks the same top and bottom, an identical amount of thread needs to feed through the needle and bobbin simultaneously. If you start to see loops on either side, you may instantly think it is a tension issue, but there are lots of other things that can cause this issue.
Tension will differ between fabrics. Check your sewing machine manual for the best setting for your fabric.
How do you get tension right?
Getting the tension right on a machine takes some practice. Perfect sewing machine tension occurs when the top and bottom threads are perfectly balanced. That means you shouldn't see any little loops on either the top or bottom of your fabric, and the stitching should look even on both sides.
Before you change the tension dial, make sure you:
1. Check your needle – A bent or blunt needle can cause tension issues as well as skipped stitches, replace if necessary making sure it is fully inserted with the flat part to the back. The chosen needle should match the type of fabric being sewn.

2. Check your machine is threaded correctly - Aside from the tension discs themselves, all the guides that the top thread passes through on its way to the needle contribute to the thread flowing at the correct rate, so it is important not to miss any. ALWAYS thread with the presser foot in the up position, as this is when the tension discs are ‘open’ so the thread can sit between them correctly.

3. Use quality thread - You will always achieve better results using a good quality thread, make sure the same thread is used for the needle and bobbin. Different weights will cause tension issues.
4. Make sure you're using matching thread - both top thread and in the bobbin.
5. Check the bobbin is wound and installed correctly - the right way and wound correctly, not too loose or too tight.

6. Make sure there aren't any top thread tangles - Check the thread isn’t caught around the spool pin, if it is it will cause the tension to become too tight. Use the correct spool cap if applicable to your machine.
7. Check for fluff - thread fibres can get caught in the tension discs, under the needle plate and in the bobbin area, check all of these and remove any offending articles.

8. Check tension dial settings - Check that the tension dial hasn’t accidentally been knocked and turned to a different setting than usual. Although machines can vary between models the tension dial settings typically run from 0 to 9. Generally, the ‘default’ position for normal straight-stitch sewing is 4 – 4.5.
9. Check for damage - Nicks or burrs can occur on the needle plate, which can snag thread and cause tension issues, have a visual check for these, they can usually be smoothed out by a technician, or a replacement plate may be necessary. The bobbin case can also suffer from nicks, so it’s a good idea to check this too, and replace it if needed.
Remember that the bobbin tension is factory-set so you won’t need to adjust it. Tension refers to the top tread tension only.
What Next?
If after exploring all of the above, tension is still not right, then it is time to look at adjusting it.
The tension dial settings run from 0 to 9, so 4.5 is generally the ‘default’ position for normal straight-stitch sewing. This should be suitable for most fabrics. For more decorative types of stitch, you may need to adjust the tension.

As a general rule of thumb, if loops occur at the back of the fabric then the top thread tension is too loose. To correct this, adjust the tension setting to a higher number, just a little at a time, and keep checking until it is correct.
If loops occur on top of the fabric then the top tension is too tight. To correct this, adjust the tension setting to a lower number, again just a little at a time, and keep checking until it is correct.
If the fabric is slightly raised or bunched loosen the tension slightly to between 3 and 4. The thickness of the thread and weight of the fabric will also have an effect on the tension. So don’t be afraid to experiment and find the setting that’s best for your specific project.
Very rarely is it an issue with bobbin tension, so often it is assumed that loops on the bottom of the fabric are due to an issue with bobbin tension. Whilst tension can be adjusted, it is a lot harder to get it back to the original factory set, so should only be considered when all other options have been exhausted. If you need to adjust bobbin tension for a specific technique, it’s best to purchase a separate case for this purpose.
We hope this helps. Feel free to give our team of sewing experts a call (01209 216942) or pop into our shop in Redruth, Cornwall (10 Chapel Street, TR15 2DB) if you still can’t get it right and we can advise you further.

Comments
Brilliant guide and help. Thankyou.
Brilliant guide and help, thankyou.
Thank you for a very detailed explanation, it’s a great article.
Leave a comment
Your Email Address Will Not Be Published. Required Fields Are Marked *


4 comments